 |
 |
 |
 |
 |
 |


This tutorial is licensed under a Creative Commons Attribution-NonCommercial-NoDerivs 3.0 Unported License.
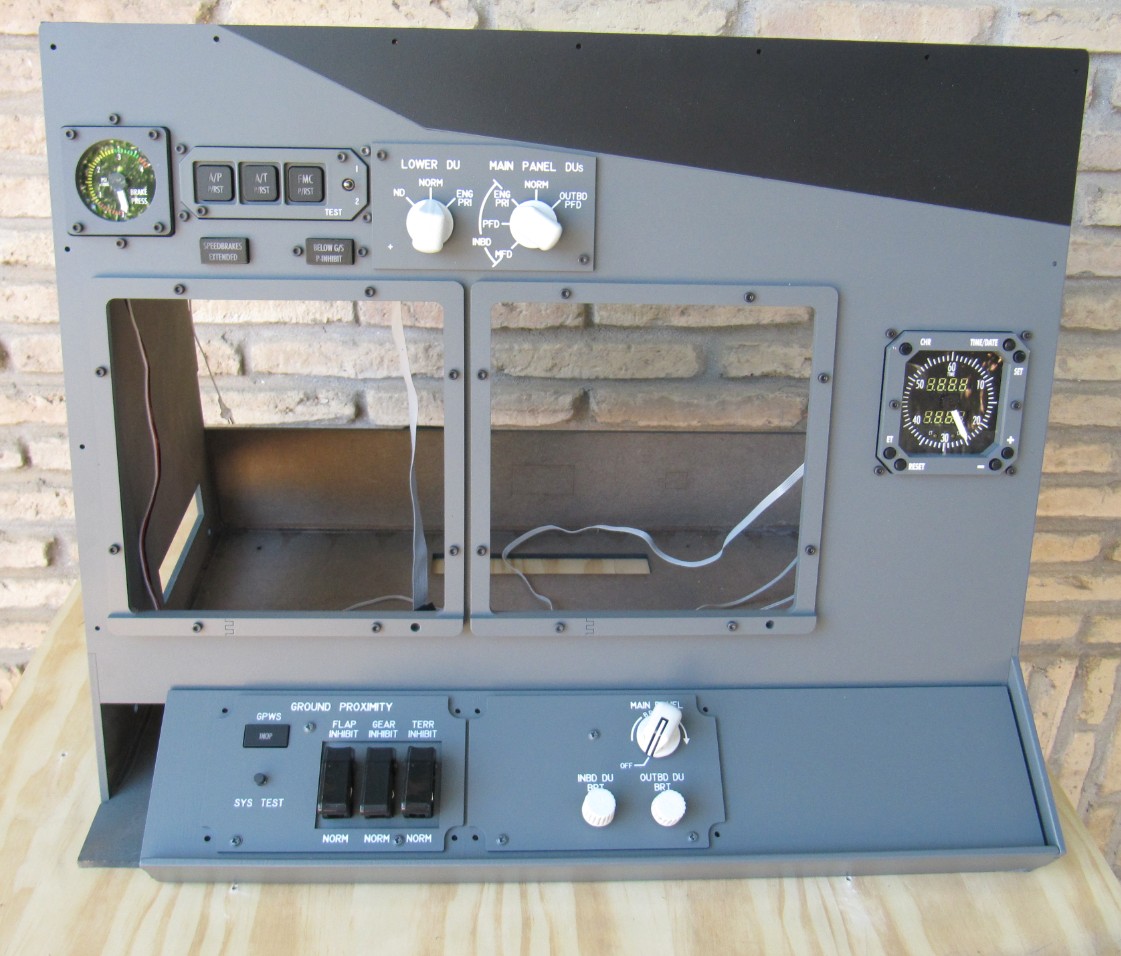
COPILOT FRONT PANEL ASSEMBLY
With this tutorial you'll be able to assembly a complete B737 copilot's side front panel by using panels, printed circuit boards and components from Hispapanels:
You can find the needed components following these links:
- copilot module
- DU control panel and its printed circuit board
- A/P A/T FMC panel and annunciators and its printed circuit board
- chrono/watch mechanical version and its printed circuit board
- chrono/watch digital version and its printed circuit board
- brakes pressure indicator
ASSEMBLY
We need to prepare the different panels before:
Assembling the DSP panel for copilot is analogue to the pilot's side one:
Like the assembly on the module:
Before starting with the assembly of the panel, we have to prepare the needed components:
- 2 annunciators
- 3 push buttons with double lights
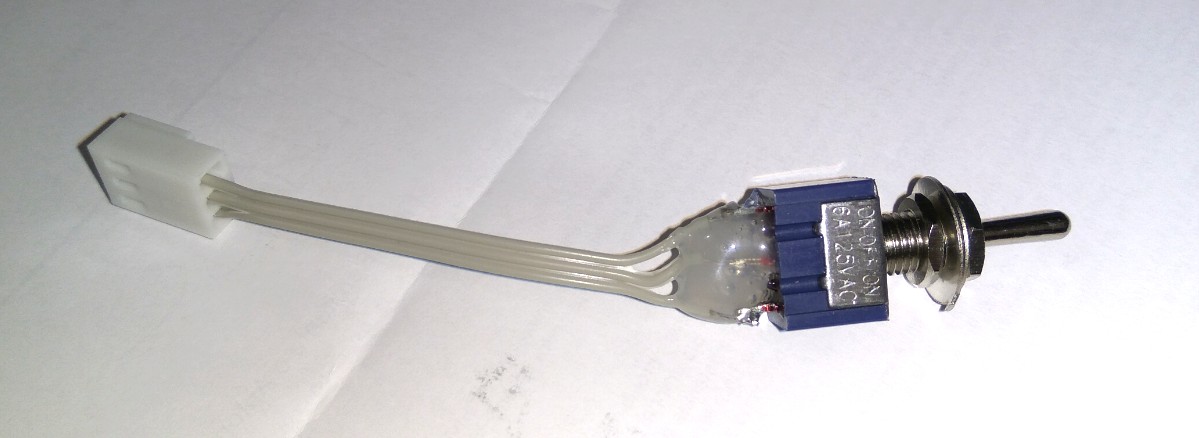
- 1 (ON)-OFF-(ON) toggle switch
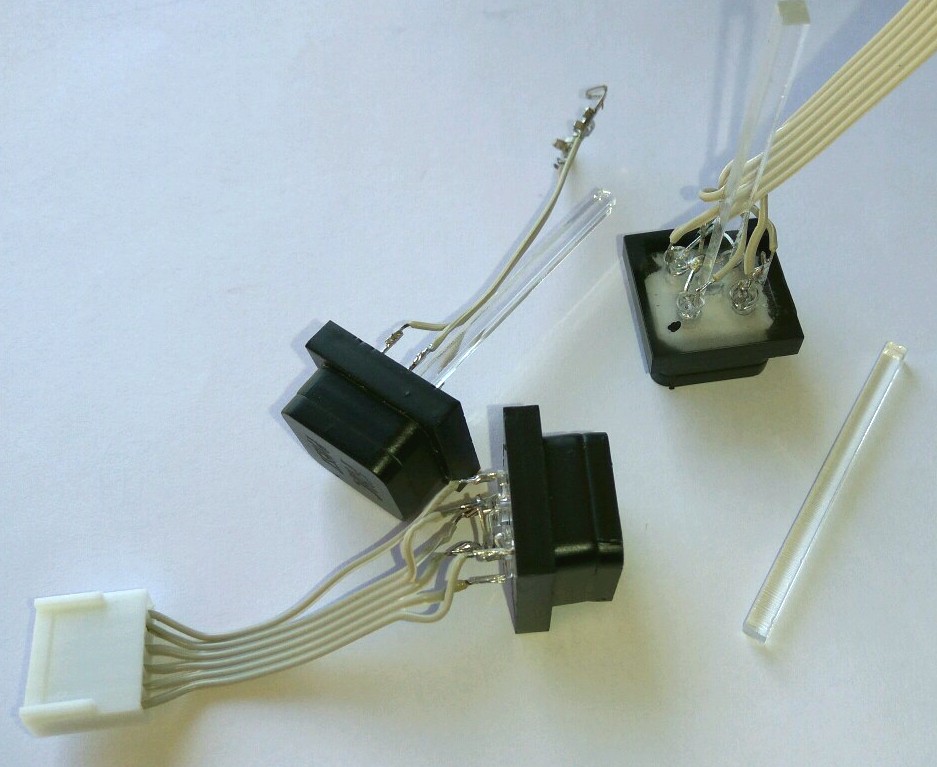
We can start with the push buttons with double lights. They are built with three pieces fitted with acethone or Acryfix.
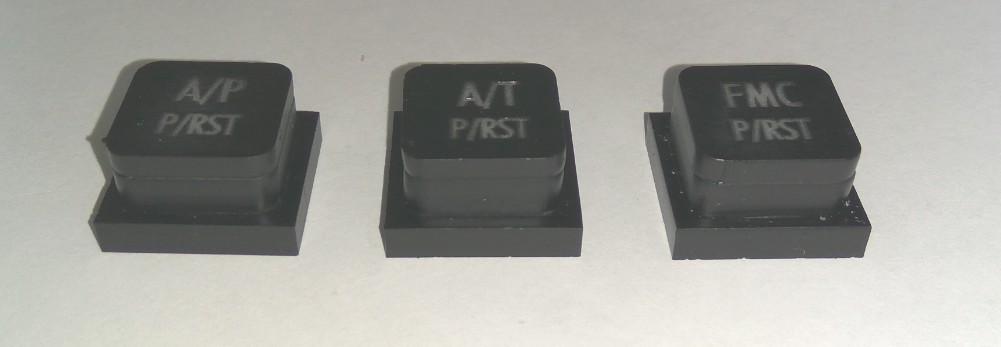
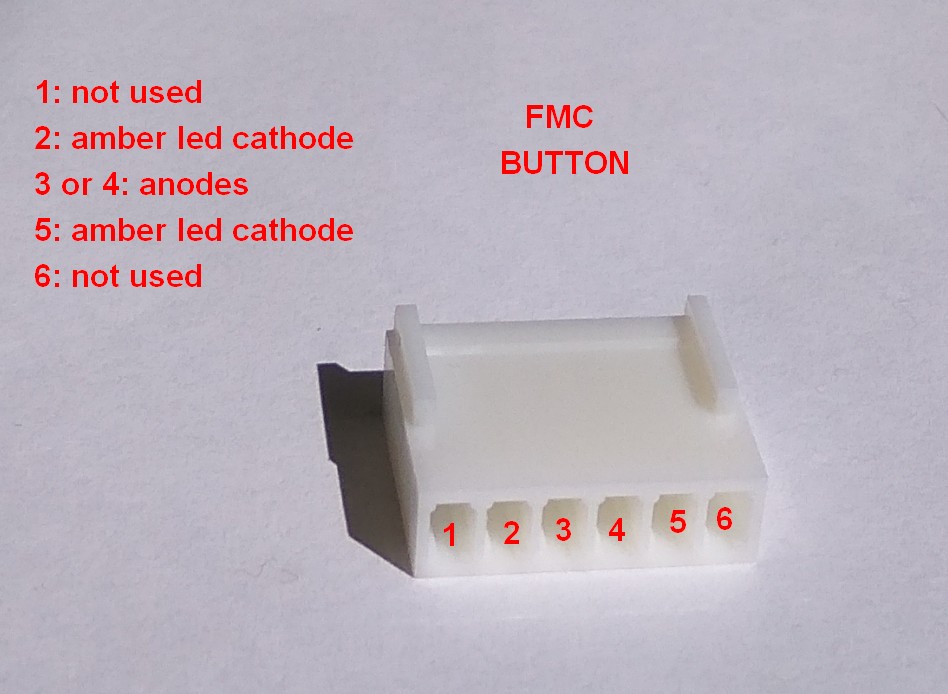
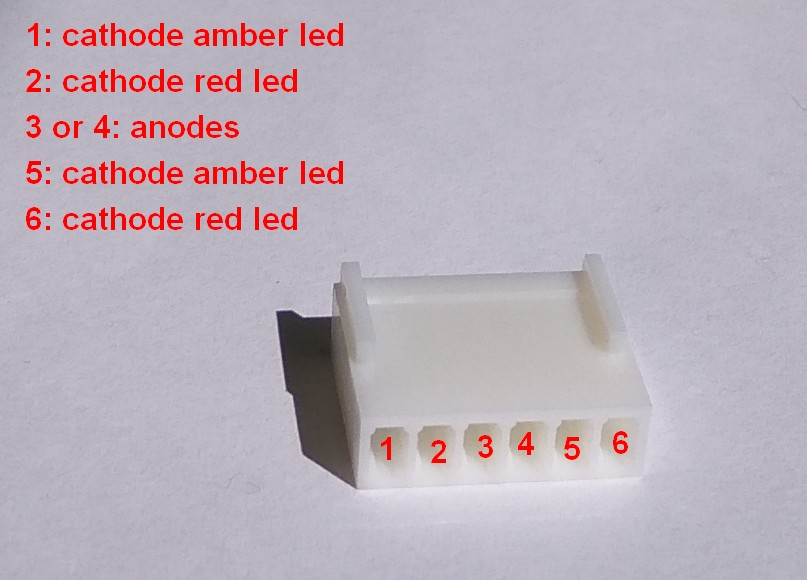
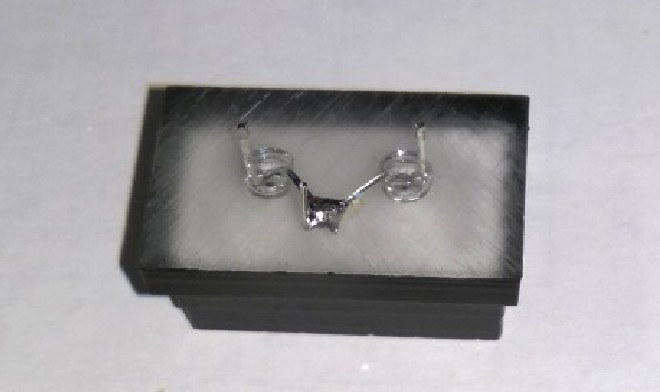
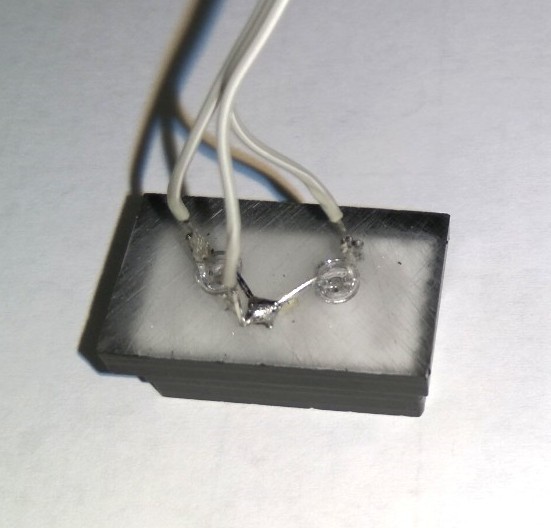
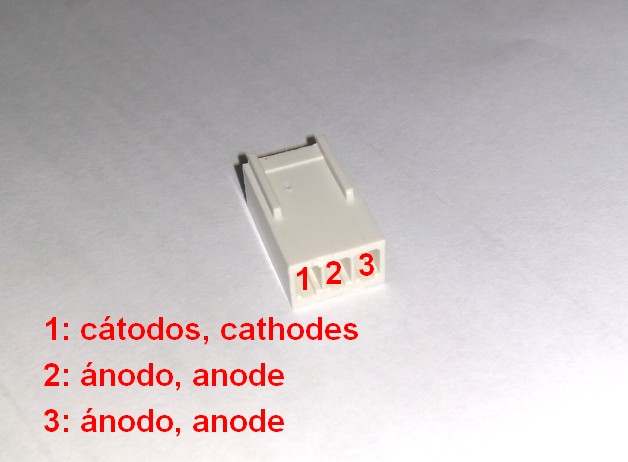
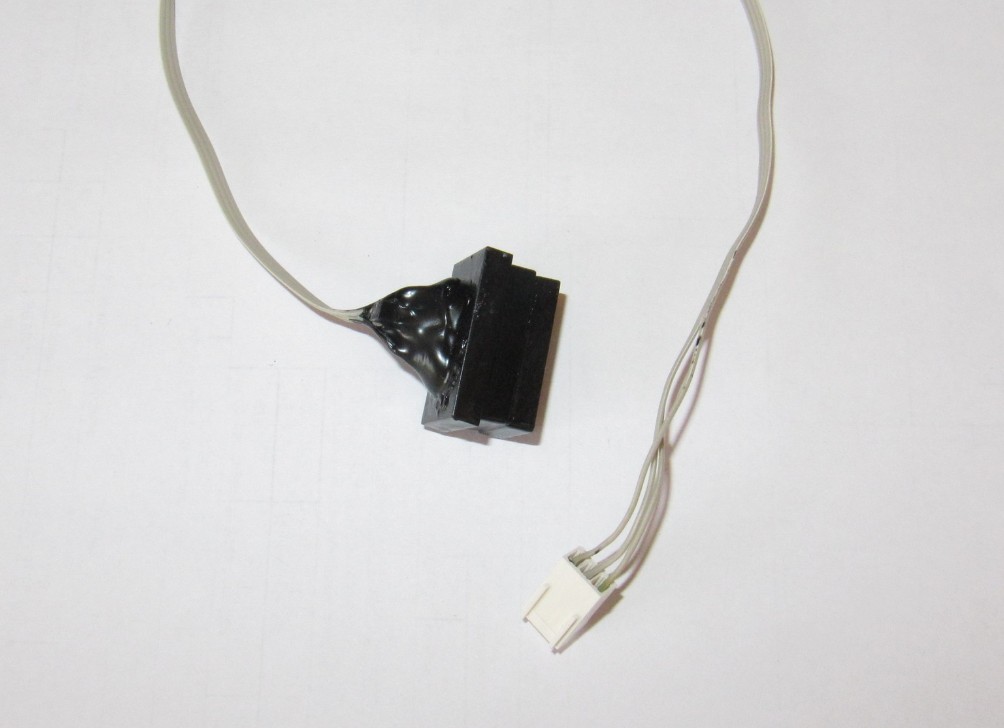
Now we install the leds. A/P and A/T buttons are illuminated with amber and red leds, placed on opposite corners. FMC button is illuminated with amber leds. Short pins are cathodes and long pins are anodes. We can mark with a pen the position of red leds. We start installing amber leds for example.
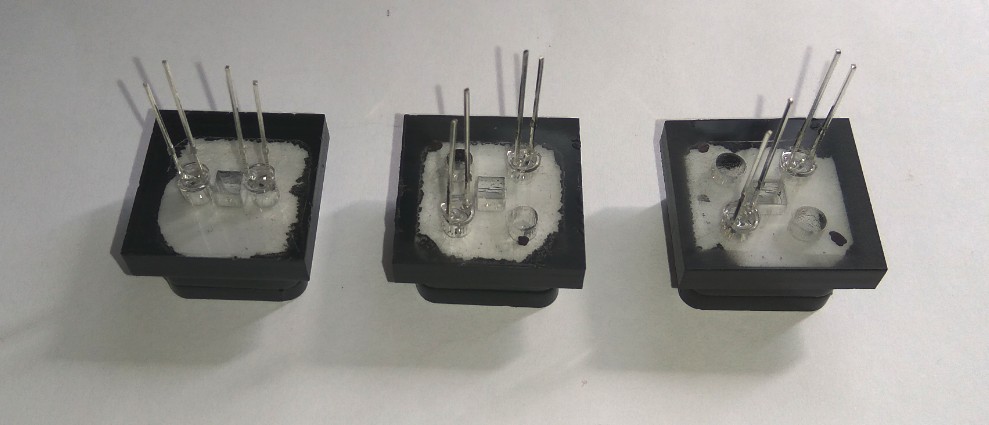
Then we place the red ones and bend the pins to weld them as indicated below.
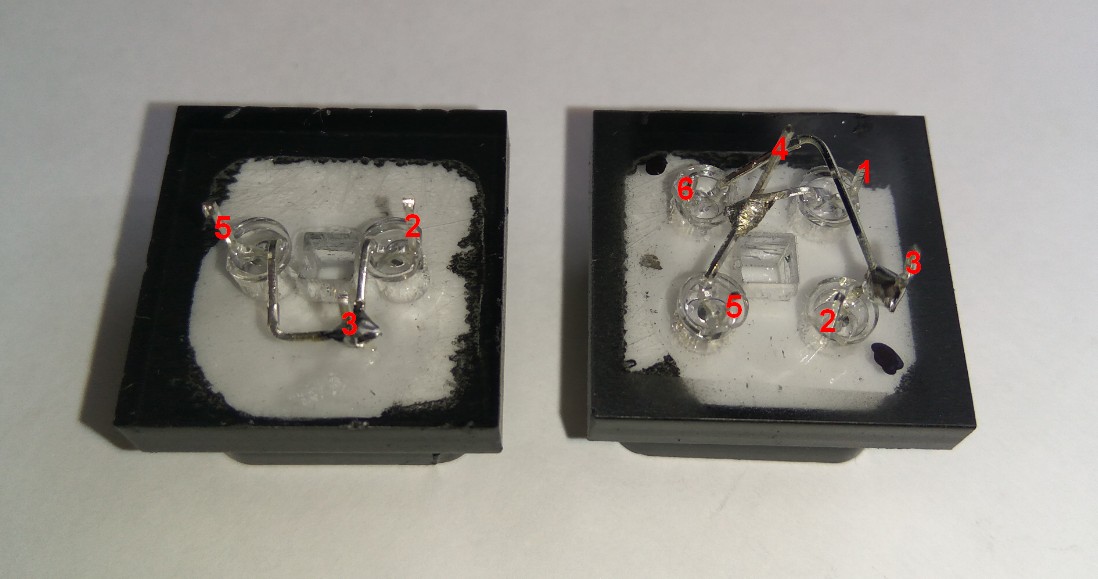
Once leds are fitted, we connect a 6-wires cable (3-wires for FMC button) with 6 cm. length. following these diagrams:
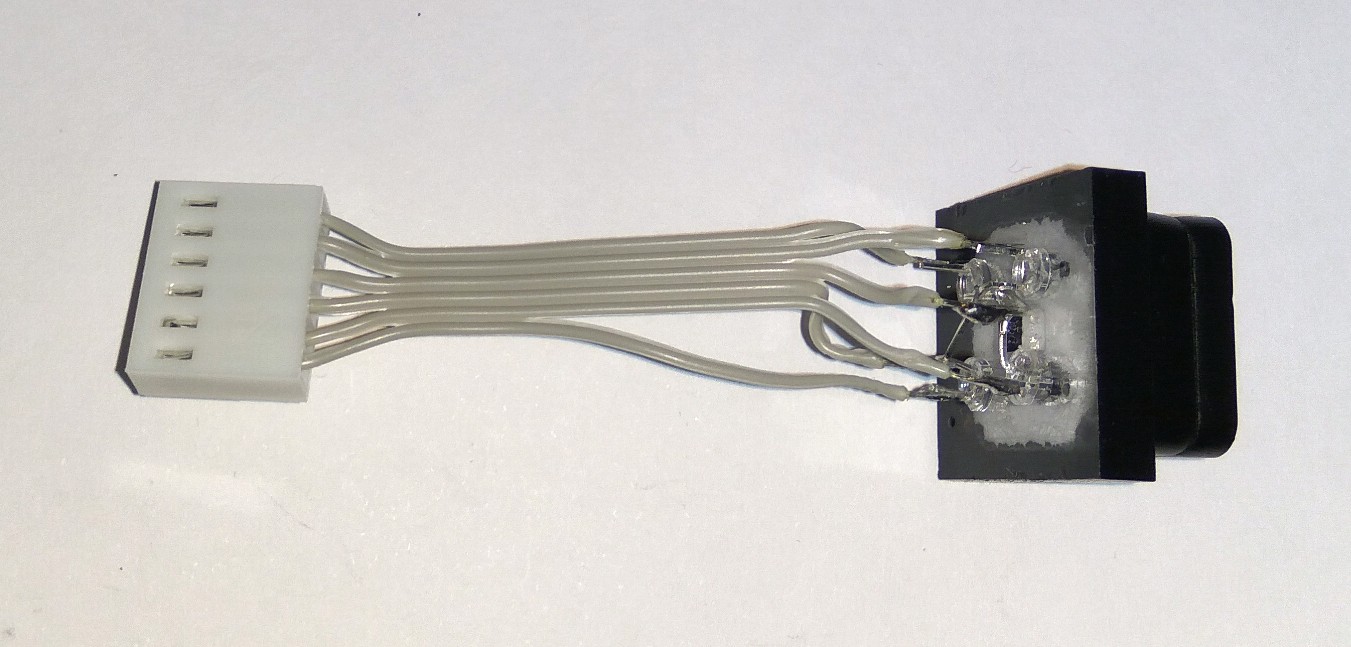
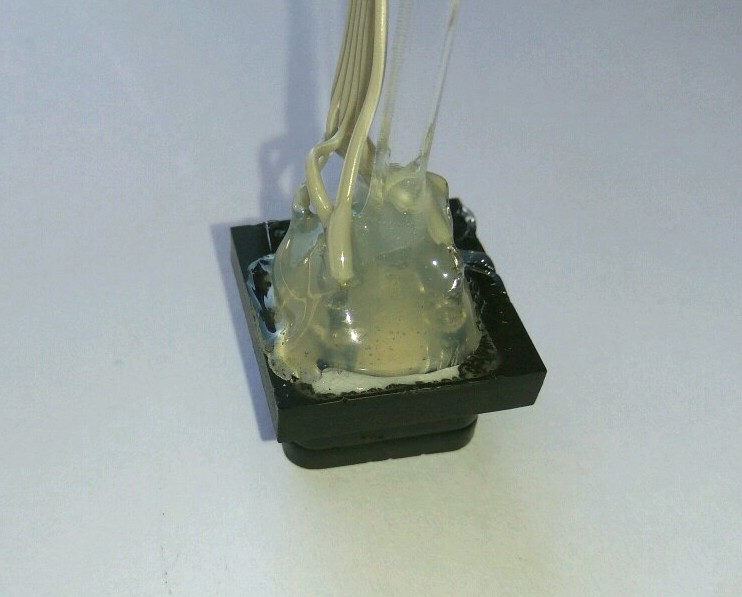
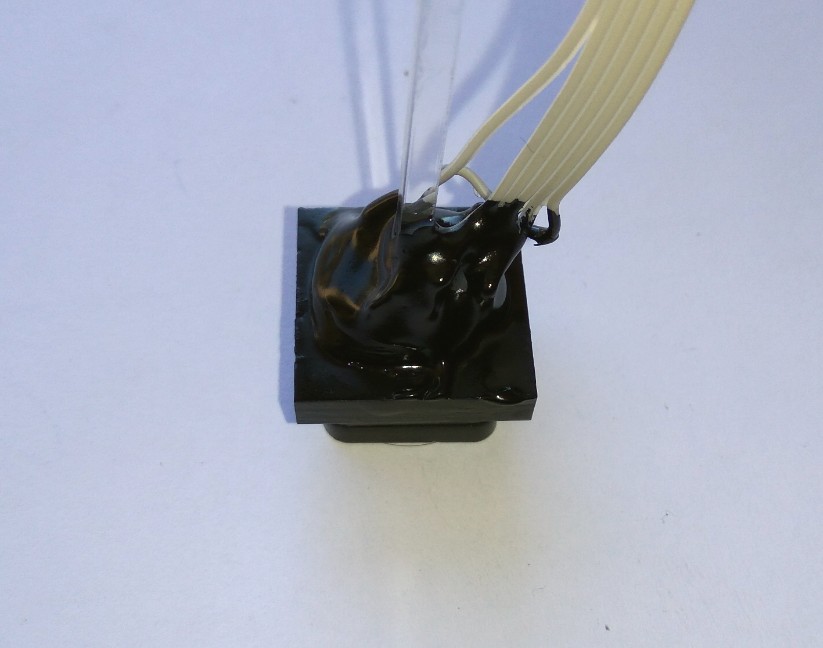
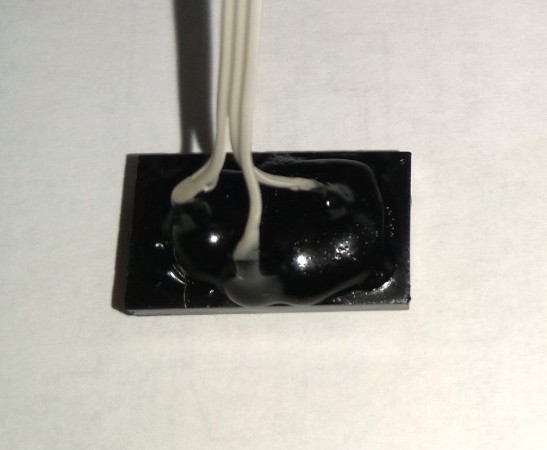
We place a little acrylic bar (3x3x50 mm), put hot glue to cover the welding areas and paint all the back side with black paint.
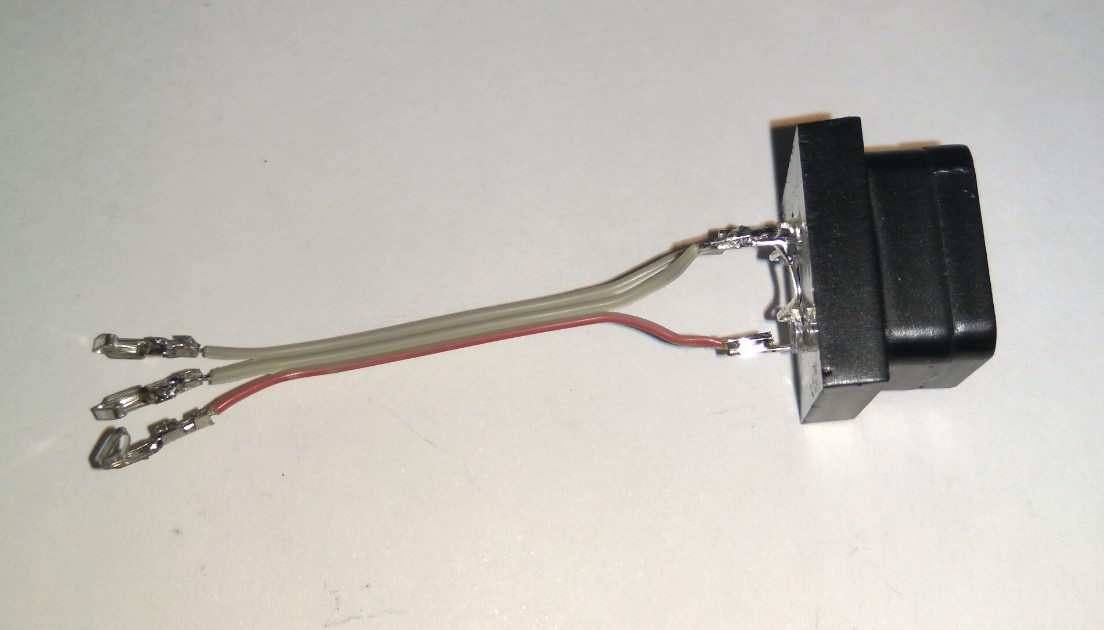
We proceed with annunciators in the same way. Lenght of cable for these annunciators is 15 cm.
Cabling for annunciators is:
We add an stick behind BELOW G/S INHIBIT, because it's a pushbutton too, and we prepare the fitting piece for the switch.
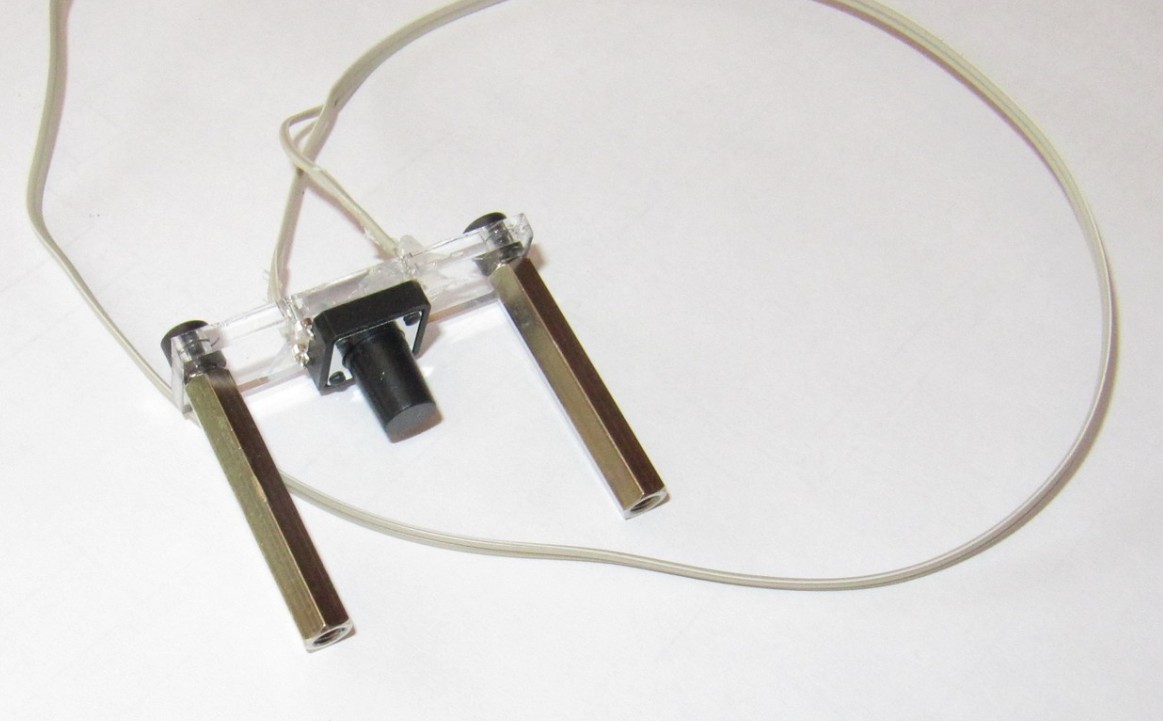
We install a 6 cm. lenght cable for toggle switch, and put hot glue on weldings.
With all these components finished, the panel assembly is shown in these videos.
Assembly of the panel:
Assembly of the panel using RAFI19 tactile switches (pilot side):
Assembly of the panel on the copilot's module:
This video shows how the mechanical version of the chrono/watch is assembled:
And this one how the chrono is installed on the copilot's module:
This video shows how the digital version of the chrono/watch is assembled:
Last updated: 27.11.2017
![]()
![]()